
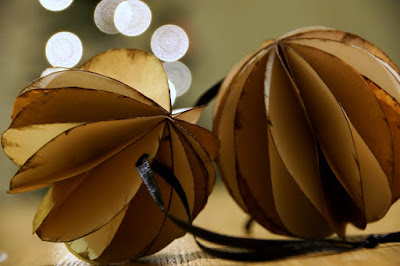
I put our tree up this weekend and I am really excited about the new ornaments I made from paper!
I used the instructions from here and found that they could be improved... so below is my step-by-step protocol.
It is really easy, which is good when you plan to make twenty! The principle is to have plenty of discs and alternate glueing them at the top then bottom to create a ruffled looking ball (like those collars in the mid-sixteen to mid-seventeenth century). I personally like the ball-shape ornaments but note that you can change it starting from any shape you fancy and obtain a really elaborate ornament like that.
 1: Cut circles in paper (mine have a diameter of 8cm).
I chose two plain colours and (white and brown/craft paper) and distressed the edges with a walnut-stain ink pad (rubbing the whole stack works well enough, no need to treat them one by one!). The original instructions suggest using patterned paper. You can also use three different papers.


3: Arrange them in an order so that you obtain two consecutive papers of the same colour.
a> b> b> a> a> b> <b <a <a <b <b <a
4: Connect them all together, either by sewing at the top and bottom of the fold, or alternatively using a stapler. If you use a staple, make sure you fold the discs as pictured so that they don't crease or create too much of a gap.


Glue at the top (if you imagine it as a clock, from 12:00 to 14:00) and press together. On the following page, glue to the bottom (from 16:00 to 18:00).
I cut a slit to pass some ribbon and voilà!

Really nice... will give it a try!
ReplyDeleteStill, this one deserves prime place on your xmas tree:
http://www.swiss-miss.com/2015/11/bacon-ornament.html